

Tips for Installing Kitchen Cabinet Fittings
Table of Contents
- Start with the Right Tools for Installing Cabinet Hardware
- Cutting Hinge Holes for Kitchen Cabinet Fittings
- Using a Cabinet Handle Installation Jig for Consistent Results
- Measuring Cabinet Handle Hole Spacing Accurately
- Cabinet Handle Placement Guide: Where to Position Handles and Knobs
- Fitting Shelf Supports and Other Kitchen Cabinet Fittings
- Frequently Asked Questions
Last Updated: 9 October 2026
Start with the Right Tools for Installing Cabinet Hardware
Tips for installing kitchen cabinet fittings come down to one thing: preparation. Get the tools and measurements right, and every hinge, handle, and shelf peg lands where it should. Rush that stage, and you are filling screw holes and buying replacement doors.
At FixFit, we supply cabinet hardware to joiners, fit-out firms, and DIYers every week. The pattern is always the same. The jobs that go smoothly are the ones where someone measured twice and drilled once.
Below, we break down the tools, the cutting methods, and the placement rules that keep a kitchen build on schedule.
Essential Cutting and Drilling Tools
A drill and a tape measure will not cut it for a professional finish. You need the right bits and cutters for the job.
For hinge cups, a dedicated cutter is essential. A Cabinet Hinge Hole Cutter does this job cleanly. It comes in 26 mm, 35 mm, and 40 mm sizes, is made from hardened and tempered tool steel, and fits any drill chuck. That covers almost every hinge cup you will meet.

You will also want:
- A cordless drill with a stable chuck
- A bradawl for starting screw holes
- A pilot bit matched to your screw size
- A fine-tooth saw for any shelf trimming
Measuring and Marking Equipment
Accuracy starts before you cut anything. A steel rule beats a tape measure for short distances because it will not flex.
Add these to your kit:
- A steel rule for hinge and handle positions
- A sharp pencil, not a pen
- Masking tape to mark drill points on finished doors
- A combination square for checking edges
Cutting Hinge Holes for Kitchen Cabinet Fittings
Hinge holes decide whether a door sits flush or hangs proud. Get the depth and diameter right, and the hinge does the rest.
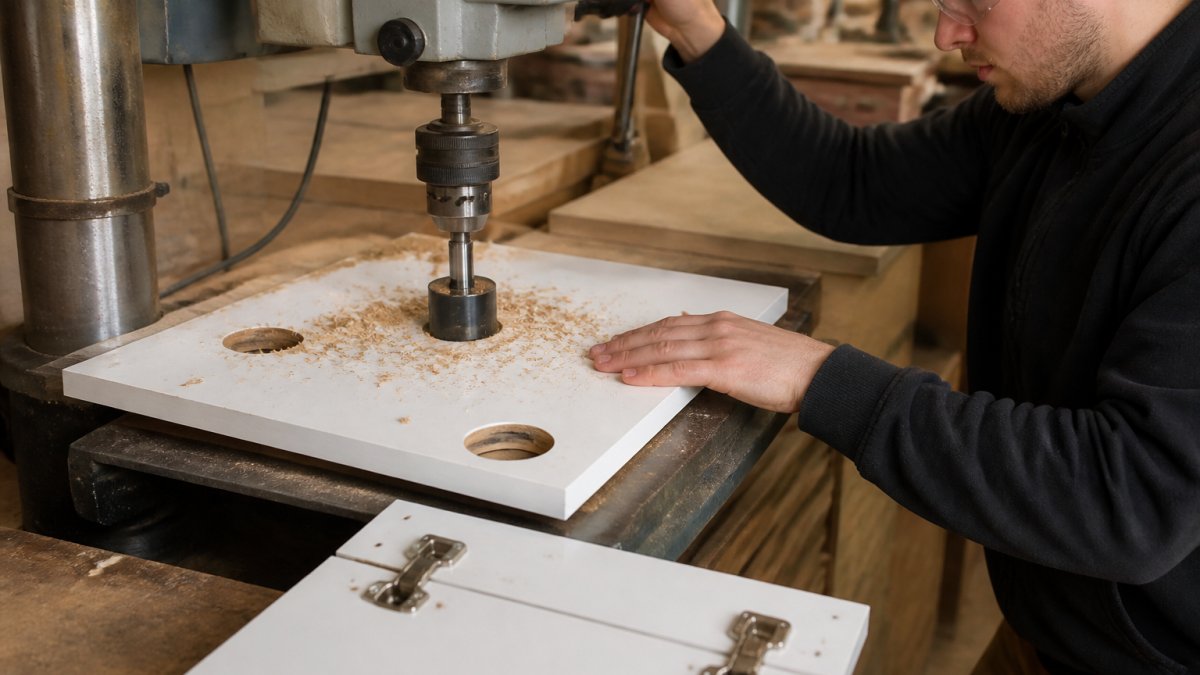
Set the cutter to the depth marked on your hinge spec. Most cup hinges need the hole bored to a set depth so the hinge body sits flush with the door face. Too shallow, and the door will not close. Too deep, and you will see the cup from the front.
Drill from the face side of the door. Support the back with a scrap board to stop the timber splintering as the cutter breaks through.
Choosing the Right Hinge Cup Size
The cup size must match the hinge, not the other way round. Standard kitchen hinges use a 35 mm cup. Slimmer cabinet hinges, like the Mini Cabinet Hinges Soft Close 26 mm, use a 26 mm cup.

Those 26 mm hinges are a good fit for smaller doors and display cabinets. They have an integrated soft-close mechanism and a 90-degree opening angle, with mounting plates included. Just note that screws are not part of the set, so add those to your order.
For larger doors, a Blum set such as the Blum Soft Close 110° Full Overlay Black Cabinet Hinge Set gives you a 110-degree opening angle and a full overlay fit. The set ships with the mounting plate, cover caps, and four screws.

Using a Cabinet Handle Installation Jig for Consistent Results
A cabinet handle installation jig is the single best purchase for anyone fitting more than a handful of doors. It clamps to the door and holds your drill bit at a fixed distance from the edge, so every handle sits at the same height.
Without a jig, you are measuring each door by hand. Small differences creep in. By the tenth door, the handles look uneven, and the client notices.
A jig pays for itself on one kitchen. It also cuts the time per door dramatically, which matters on a fit-out with a tight schedule.
Set the jig once, check it against a test piece, then work through the doors in batches. Keep the same reference edge on every door so the spacing stays true.
Measuring Cabinet Handle Hole Spacing Accurately
Measuring cabinet handle hole spacing is where most DIY installs go wrong. The spacing is the centre-to-centre distance between the two fixing holes, not the overall length of the handle.
Pull handles and bar handles are sold by their hole centres. A handle listed as 160 mm has 160 mm between its two screw holes, even though the bar itself is longer.
To measure accurately:
- Check the handle spec for the centre-to-centre figure
- Mark the first hole, then measure from its centre to the second
- Use a steel rule, not a tape, for the short distance
- Mark both points before drilling either
For single-hole knobs, spacing does not apply. You only need the position, which the next section covers.
Cabinet Handle Placement Guide: Where to Position Handles and Knobs
Handle position is a design choice, but a few rules keep it looking deliberate.
On base cabinets with drawers, centre the handle on the drawer front. On doors, place the handle near the opening edge, usually 40 to 50 mm in from the side and aligned with the top or bottom rail.
| Cabinet Type | Handle Position | Typical Inset |
|---|---|---|
| Base door | Near opening edge, upper rail | 40-50 mm from edge |
| Wall door | Near opening edge, lower rail | 40-50 mm from edge |
| Drawer front | Centred horizontally | Centred on height |
| Tall larder | Near opening edge | 40-50 mm from edge |
Keep every handle in a run at the same height. Use a jig or a marked batten to hold that line across the whole kitchen.
Fitting Shelf Supports and Other Kitchen Cabinet Fittings
Shelf supports are quick to fit, but they still need care. The Chrome Shelf Support Pegs Ø5 mm for Wood Shelves Support are a press-fit design for 5 mm holes, made from zinc with a chrome finish.
Drill the holes at matching heights on both sides of the cabinet. Use a shelf-pin jig or a marked batten to keep the rows level. A support that sits a millimetre out will make the shelf rock.
For adjustable shelving, drill a series of holes at even intervals so the shelf height can change later. Mark the first hole, then step down using a spacer block for repeatable spacing.
Check that each peg seats fully before loading the shelf. A peg that is only half in will pull out under weight.
The same discipline applies to every fitting in the cabinet. Measure, mark, check, then fix. That order saves rework on every job.
Frequently Asked Questions
Can you install cabinet handles without a jig?
Yes, but it is slower and easier to get wrong. A jig holds your drill bit at the correct spacing and keeps the bit perpendicular to the door face. Without one, you can still mark both holes with a steel rule and square, then centre-punch the positions before drilling. The risk is that a small angle error becomes visible once the handle is fitted. For a single cupboard, careful marking works. For a full kitchen, a jig saves time and prevents uneven handles.
How do you fix a cabinet handle hole drilled in the wrong place?
If the hole is only slightly off, you may be able to enlarge it carefully and fit a handle with a larger fixing screw, or fill it with a wooden dowel glued in place, then re-drill once set. For a more visible mistake on a painted door, fill with two-part wood filler, sand flush and touch up the finish. On a solid wood door, a glued dowel is the strongest repair. If the door is beyond saving, replacing it is often cheaper than a complex repair.
What tools do you need to install kitchen cabinet fittings?
For hinges, you need a hinge hole cutter in the correct cup size (26mm, 35mm or 40mm) and a drill. For handles, a tape measure, steel rule, square, pencil and a 4mm or 5mm drill bit matched to your screws. A cabinet handle installation jig makes the job faster and more accurate. A bradawl or centre punch helps start holes cleanly. For shelf supports, a 5mm drill bit is usually all you need. Add a screwdriver or cordless drill driver for final fixing.
How do you make sure cupboard handles are fitted evenly?
Measure from a consistent reference point on every door, usually the top edge for base units and the bottom edge for wall units. Mark the centre of each handle position, then use a jig or a spacer block to repeat that measurement across all doors. Check each door against the one next to it before drilling. If you are fitting handles to drawers, measure from the top edge of the drawer front. A cabinet handle placement guide helps you keep the same offset throughout.
Kitchen fitting rewards patience over speed. The right cutter, a good jig, and accurate spacing turn a fiddly job into a repeatable one. FixFit stocks the hardware to match, from GTV and Blum hinges to shelf supports and cutters, with trade-friendly pricing and stock you can rely on. Browse the range and get the right fittings for your next project, first time.