

How to Install European Style Cabinet Hinges
Table of Contents
- What You'll Need: Tools and Materials for Installing European Cabinet Hinges
- Understanding European Style Cabinet Hinges Before Installation
- Measuring and Marking for European Cabinet Hinge Placement
- Tools Needed for Cabinet Hinge Installation: Drilling and Fastening
- Step-by-Step Guide to Installing European Cabinet Hinges
- Cabinet Hinge Adjustment Guide: Fine-Tuning Your Installation
- How to Fix Misaligned Cabinet Doors
- Common Mistakes to Avoid During Installation
- Frequently Asked Questions
Last Updated: September 28, 2026
What You'll Need: Tools and Materials for Installing European Cabinet Hinges
Installing European style cabinet hinges requires specific tools and materials to achieve professional results. You'll need a power drill, a hinge drilling jig, hole cutters, and quality fasteners to complete the job properly.

Here's what to gather before you start:
- Power drill or cordless screwdriver
- Hinge drilling jig (like the Blum M31.1000 ECODRILL)
- Cabinet hinge hole cutters (26mm, 35mm, or 40mm depending on hinge size)
- Hinge screws (3.9mm x 16mm or 3.5mm x 15mm)
- Measuring tape and pencil
- Spirit level
- Masking tape
- Safety goggles and dust mask
- Clamps to hold the door steady
The right tools make installation faster and more accurate. A drilling jig is particularly important for European cabinet hinges because it ensures consistent hole placement across multiple doors.
Understanding European Style Cabinet Hinges Before Installation
European style cabinet hinges differ significantly from traditional butt hinges. They use a cup-and-plate design where the hinge cup sits inside a drilled hole in the door, and the mounting plate attaches to the cabinet frame.
These hinges offer several advantages:
- Concealed design hides the hinge mechanism inside the door
- Adjustable in three directions for precise alignment
- Smooth, quiet closing with damping options
- Professional appearance suitable for high-end installations
- Compatible with soft-close and push-to-open systems
The mounting plate screws directly to the cabinet side panel. Understanding this basic structure helps you approach installation with confidence and avoid common mistakes during the process.
Measuring and Marking for European Cabinet Hinge Placement
Accurate measurement determines whether your doors align perfectly or sit crooked. Measure twice, mark once, and use a drilling jig to ensure consistency across all doors.
Start by establishing your hinge positions. European hinges typically sit 80-130mm from the top and bottom of the door. Most standard installations use two hinges per door, positioned roughly 80mm down from the top and 80mm up from the bottom.
Mark the edge distance from the door's side. Use masking tape along the door edge to prevent the drill bit from slipping when you start drilling.
A drilling jig simplifies this process dramatically. The Blum M31.1000 ECODRILL features adjustable side stops with a measuring scale from 80-130mm, allowing you to set your hinge positions without constant remeasuring. The jig accommodates material thicknesses from 15 to 40mm with spring-assisted self-clamping (ECODRILL).
Tools Needed for Cabinet Hinge Installation: Drilling and Fastening
The correct tools separate a professional installation from a frustrating one. A quality drilling jig is your most important investment for installing European-style cabinet hinges accurately.
Essential drilling equipment:
- Hinge drilling jig with adjustable positioning
- 35mm hole cutter for standard European hinges
- 8mm drill bit for mounting plate holes
- Power drill with adequate torque
- Dust extraction attachment (many jigs include sockets for 32-42mm hoses)
Fastening tools:
- Cordless screwdriver with PZ2 (Pozidriv) bit
- Cabinet hinge screws in appropriate sizes
- Magnetic bit holder to prevent dropped screws
The FixFit Cabinet Hinge Hole Cutter comes in 26mm, 35mm, and 40mm sizes to match different hinge specifications. These hardened steel cutters fit any standard drill chuck and deliver clean, precise holes without splintering.

For mounting plate fastening, the FixFit Cabinet Hinge Screws (3.9mm x 16mm) feature a double countersunk head that reduces shear likelihood and assists completion of countersinking. These zinc-plated screws work with soft timber applications and include 60° twin-threads for faster insertion and greater pull-out resistance.
Step-by-Step Guide to Installing European Cabinet Hinges
Follow these steps methodically to achieve professional results when installing European-style cabinet hinges on your doors and cabinets.
Step 1: Drill the Hinge Cup Hole
Position your door securely on a flat work surface using clamps. Attach your hinge drilling jig to the door edge, aligning it with your marked positions. The jig should sit flush against the door face.
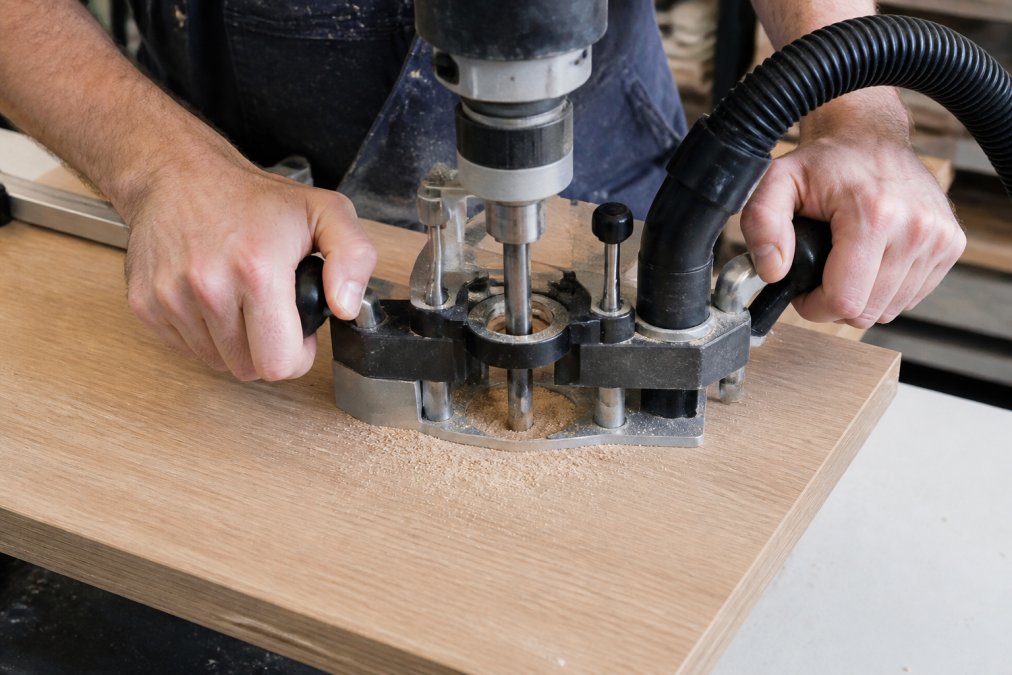
Insert your 35mm hole cutter into the drill chuck. Start drilling slowly to establish the hole, then increase speed once the bit has bitten into the wood. The jig will guide the drill perpendicular to the door face, ensuring a straight hole.
Drill to the correct depth. Stop drilling when the cutter reaches the depth stop on your jig. Remove the jig carefully and inspect the hole for cleanliness.
Step 2: Install the Mounting Plate
Flip your door over and position the mounting plate on the inside edge. The plate should align with your hinge cup hole. Use the jig's integrated template to mark the mounting plate screw holes with precision.
Drill pilot holes for your mounting screws using an 8mm bit. These small holes prevent wood splitting and guide your fasteners straight. Keep the drill perpendicular to avoid angled screw holes.
Insert your cabinet hinge screws through the mounting plate holes. Use a cordless screwdriver with a PZ2 bit to drive screws firmly but not excessively. Over-tightening can strip the wood or damage the plate.

Step 3: Attach the Hinge to the Door
Insert the hinge cup into the hole you drilled in Step 1. The cup should sit flush with the door face.
Blum M31.1000 ECODRILL Hinge Drilling →
Press the hinge cup into position until you hear a click. This indicates the cup has engaged fully. The hinge arm should extend horizontally from the cup, ready to connect to the cabinet frame.
Verify the hinge cup sits level and straight. A misaligned cup will cause door binding and difficult adjustment later. Take a moment to confirm proper seating before moving forward.
Step 4: Mount the Door to the Cabinet
Position your door against the cabinet frame. The mounting plate should face the inside of the cabinet. Align the hinge arm with the corresponding bracket on the cabinet side panel.
Insert the hinge arm into the bracket. Slide the arm into the bracket until it seats fully.
Secure the bracket to the cabinet frame using the provided screws. Drive fasteners firmly to create a solid connection. The door should now hang level, though minor adjustments will likely be needed.
Cabinet Hinge Adjustment Guide: Fine-Tuning Your Installation
European style cabinet hinges offer three-directional adjustment to correct minor misalignment. You can adjust the door height, depth, and side-to-side position without removing the door.
Height adjustment: Most hinges include a screw that moves the door up or down. Turning this screw clockwise raises the door, whilst anticlockwise lowers it. Make small quarter-turn adjustments and check the result before turning further.
Depth adjustment: A second screw moves the door forward or backward. This corrects gaps between the door and cabinet frame. Clockwise typically pushes the door away from the cabinet, whilst anticlockwise pulls it closer.
Side adjustment: The third screw shifts the door left or right. This corrects misalignment along the door's edge. Use this adjustment to centre the door within the frame opening.
Test each adjustment carefully. Open and close the door after each quarter-turn to verify the change. Gradual adjustments prevent over-correcting and creating new problems.
How to Fix Misaligned Cabinet Doors
Misaligned cabinet doors result from installation errors, wood movement, or incorrect adjustment. Identifying the problem type helps you apply the correct fix when your doors don't sit properly.
Door sits too high or too low: Use the height adjustment screw on your hinge. This is the quickest fix for vertical misalignment. Make quarter-turn adjustments until the door aligns with adjacent doors and the cabinet frame.
Door sticks out from the cabinet: Your depth adjustment screw controls this issue. If the door protrudes, turn the screw to pull it closer to the frame. If the door sinks into the frame, turn the screw the opposite direction.
Door leans left or right: Side adjustment corrects this problem. The third adjustment screw shifts the door horizontally. Make small turns and test the door position after each adjustment.
Gaps appear around the door: Uneven gaps indicate the door isn't level. Check both height and depth adjustment. A spirit level helps you verify the door sits square in the frame.
Door binds or rubs: This usually results from incorrect depth positioning. The door sits too far into the cabinet opening. Adjust the depth screw to pull the door forward slightly. Test the movement after each adjustment.
Most misalignment issues resolve with careful use of the three adjustment screws.
Common Mistakes to Avoid During Installation
Understanding common pitfalls helps you prevent frustration and rework. These mistakes appear frequently in installation attempts, particularly among first-time installers of European-style cabinet hinges.
Frequently Asked Questions
What is the standard distance from the edge for a 35mm hinge hole?
Using a drilling jig like the Blum ECODRILL ensures accurate distance from the edge for hinge holes, eliminating guesswork and reducing installation errors.
Do I need a special drill bit to install concealed European hinges?
Yes, you need a specialised hinge hole cutter to install concealed European hinges properly. A standard drill bit will not create the precise cup-shaped hole these hinges require. Cabinet hinge hole cutters come in 26mm, 35mm, and 40mm diameters, depending on your hinge size. These hardened steel cutters fit any standard drill chuck and create clean, accurate holes. For professional results and consistent hole depth, a drilling jig like the Blum M31.1000 ECODRILL is essential, as it guides the cutter and ensures repeatable accuracy across multiple doors.
Can I replace old cabinet hinges with European style hinges?
Yes, you can replace old cabinet hinges with European style hinges, but the process depends on your existing door and cabinet. If your old hinges left holes or damage, you may need to fill and sand the door before drilling new hinge holes. European hinges require precise hole placement, so measure carefully before drilling. The advantage of upgrading to European hinges is improved adjustment capability and smoother operation. If you're unsure about measurements, FixFit's customer service team can help you identify the correct hinge specifications for your cabinet.
How do I measure for European cabinet hinge placement?
Measure the distance from the top and bottom edges of your door to determine hinge placement. Standard practice is to position the top hinge 80mm from the top edge and the bottom hinge 80mm from the bottom edge. For doors taller than 800mm, add a third hinge in the middle. Use a drilling jig to ensure accuracy. Mark both the hinge cup hole position and the mounting plate screw holes before drilling to prevent misalignment.